

The bread of my childhood was nothing to write home about. Like most American kids, I was on Team White Bread, calling upon persuasive rhetoric in grocery store aisles to convince my parents to choose Oroweat Country Potato over that stuff that’s mostly seeds and nuts and not really bread at all. Blech. That is to say, bread was always more a vehicle for stuff – peanut butter, bologna, you know…kid food! As I got older, not much changed. Bread was a necessary evil required for soaking up olive oil or spreading cheese. It wasn’t until I arrived in San Francisco, the bread capital of the country, that I learned that bread was much more than a host – it’s a centerpiece.
First, there was Tartine Bakery. I’d heard tales of around-the-block lines made up of dedicated (see: desperate) acolytes waiting patiently till the clock stuck 4pm for their chance at fresh-out-of-the-oven loaves. When I first completed this civic duty, I scored a sesame encrusted still-warm loaf. One bite in, I was on the bread-obsessed bandwagon San Francisco is riding. The crust was crunchy firm, the inside dense, a little doughy, and slightly sour. It needed nothing, but we still smeared it with butter and Maldon because #yolo.
Soon, I was buying $8 loaves weekly. There was Acme and Semifreddi's, Arizmendi and Josey Baker Bread. Each loaf, more perfect than the last. Each bite, a reminder that I’d hit the jackpot when I moved to San Francisco.
This all, I understand, sounds pretentious. And I’m with you, it is pretentious. But hear me out. Bread doesn’t get enough credit. For all the time and labor and extra special attention it needs (and kneads), it really deserves way more praise than it gets. And now, having made some myself, I can tell you for certain that it’s no easy feat.
Baking is science. You have to get everything just right or the whole thing is wrong. Cooking is more in my wheelhouse, where I can add a little of this, skip that, and combine these until it tastes the way I want it to. But bread baking is a whole different ball game. Not only does everything need to be just right, but also you’re working with time, with live cultures, and with big shoes to fill.
Luckily, baking bread isn’t always as high maintenance as the classic Tartine recipe. My co-worker, desk frenemy, and dear friend Gina embarked on this glutenous voyage, bringing me along for daily starter feedings. The resulting loaves spawned from her starter have been deliciously sour, moist, and begging to be slathered with butter and salt or devoured straight up. I’ve loved being a bystander in this process, but the whole thing seemed like a lot of responsibility (this, a great reminder that despite every bone in my body telling me otherwise, I’m not, in fact, ready for a dog).
I like to keep things pretty low maintenance, so when Gina told me about this No-Kneed bread recipe from Sullivan Street Bakery in New York, I perked right up.
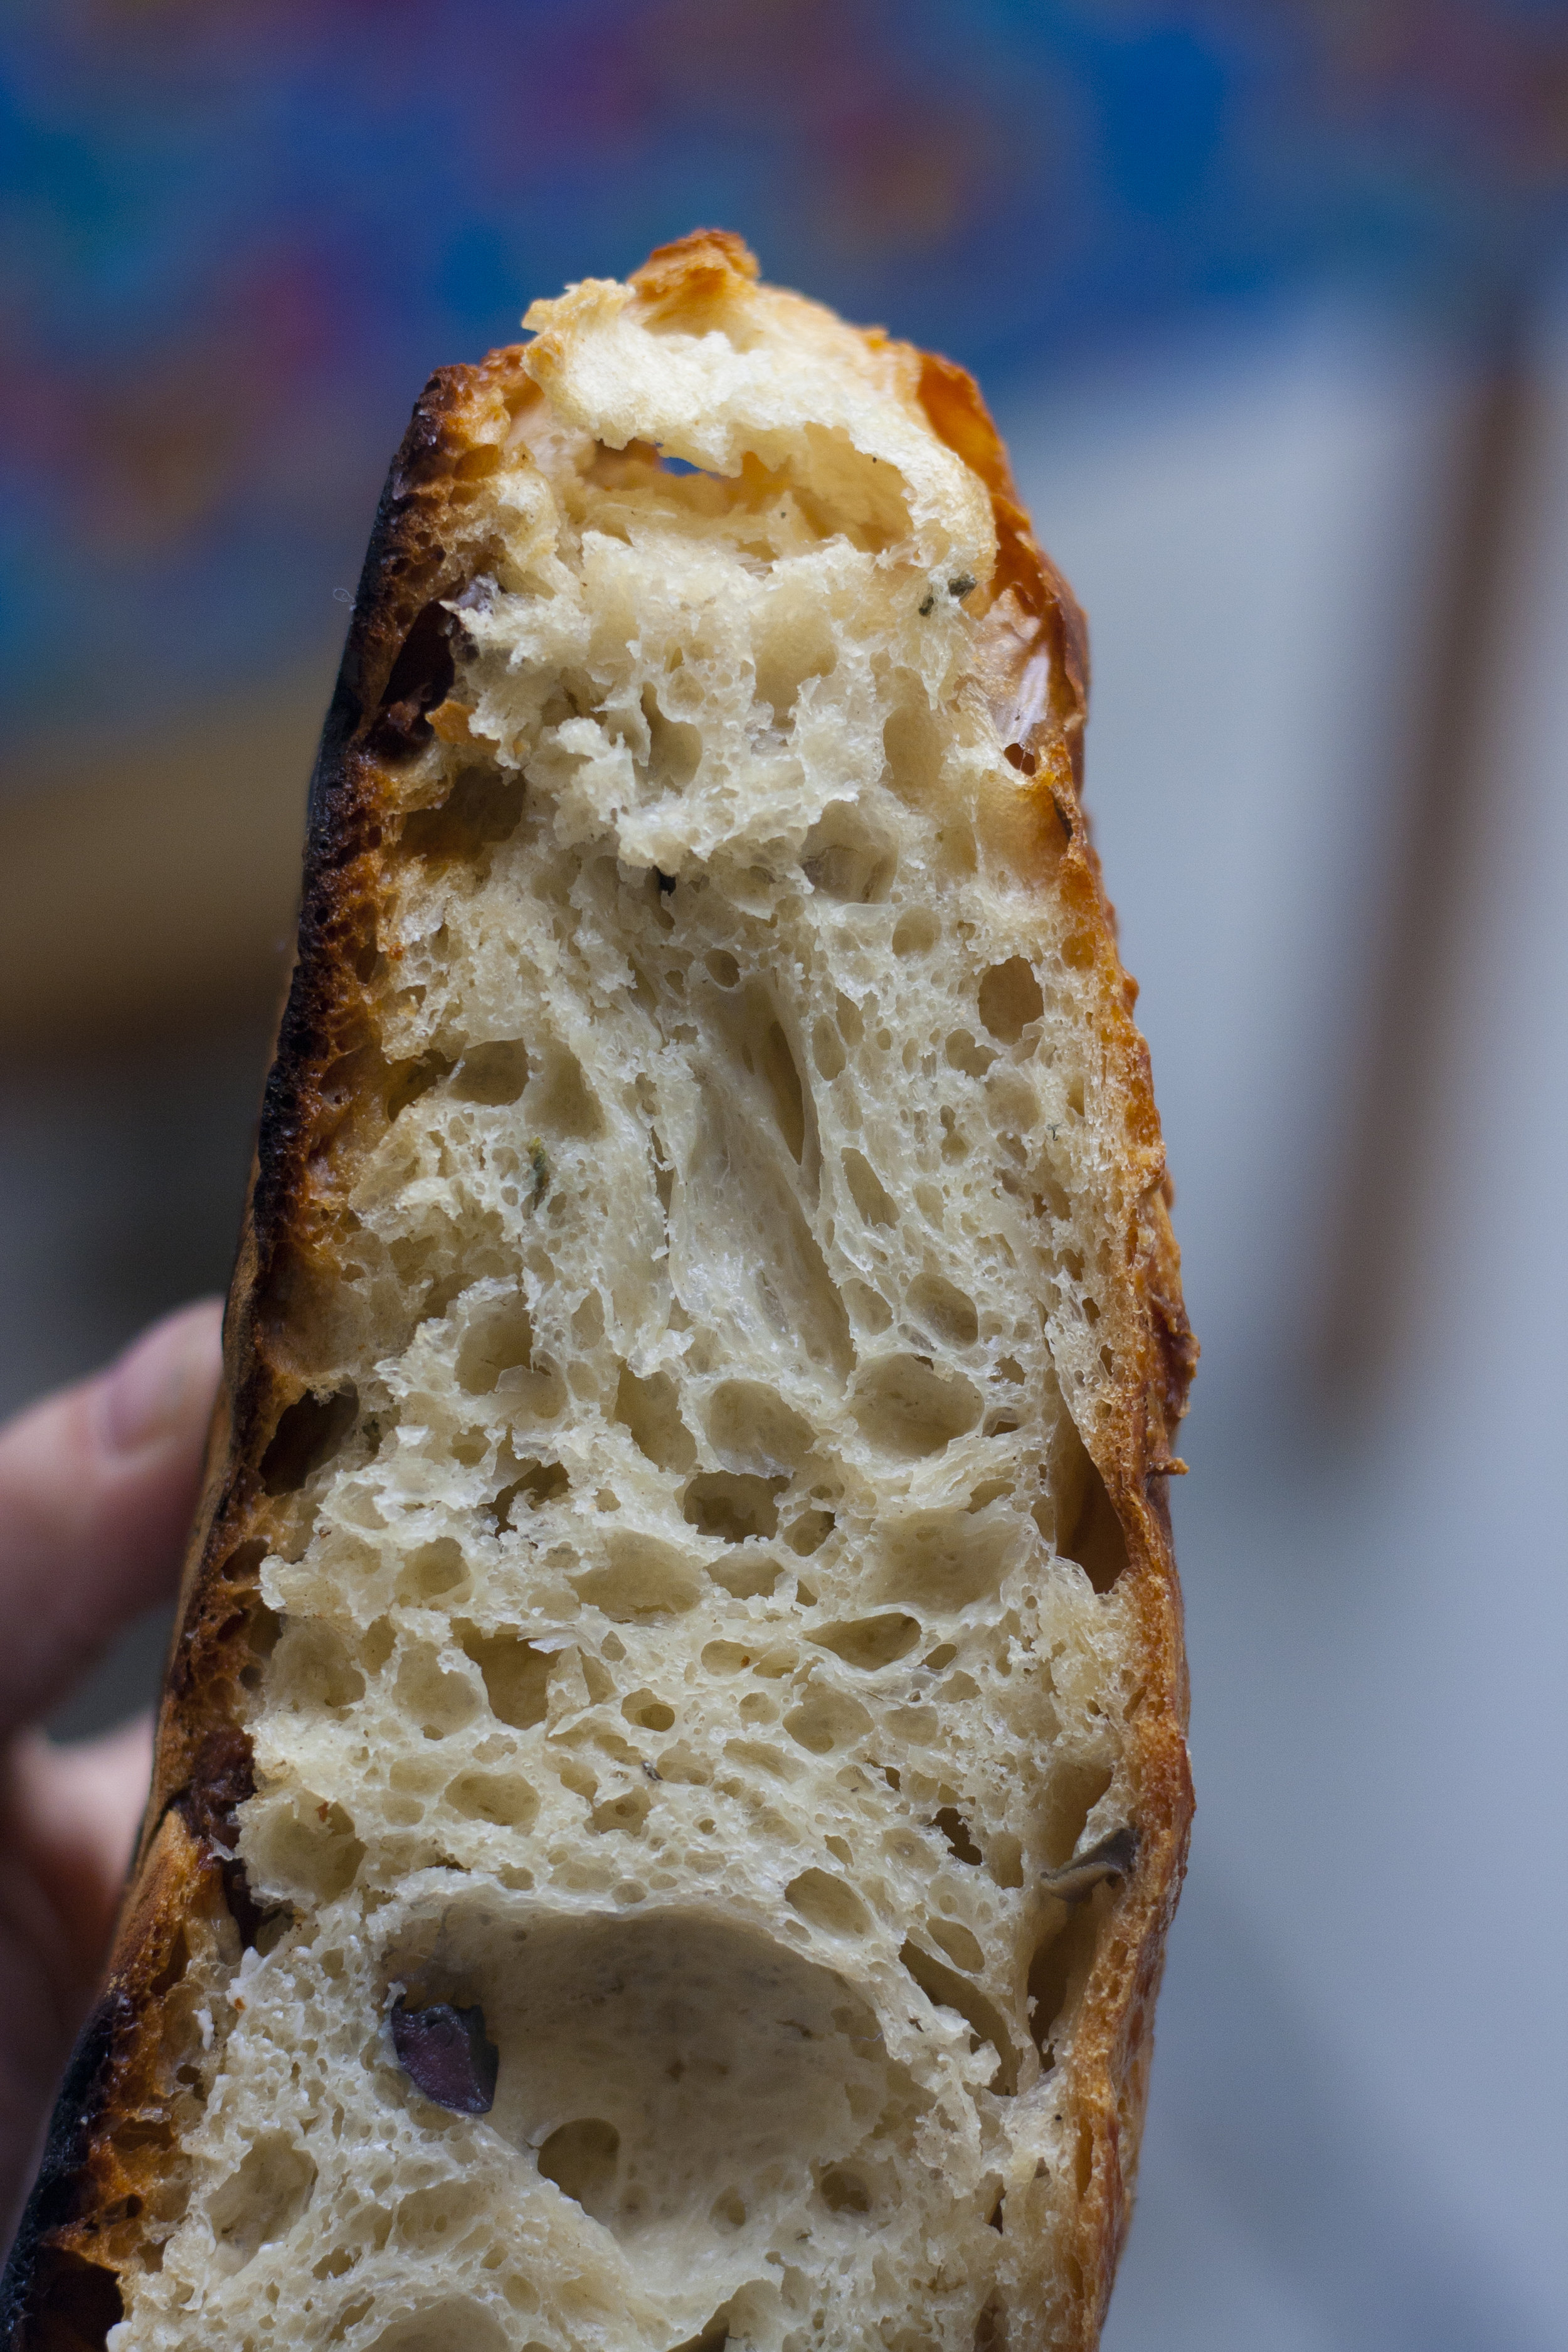
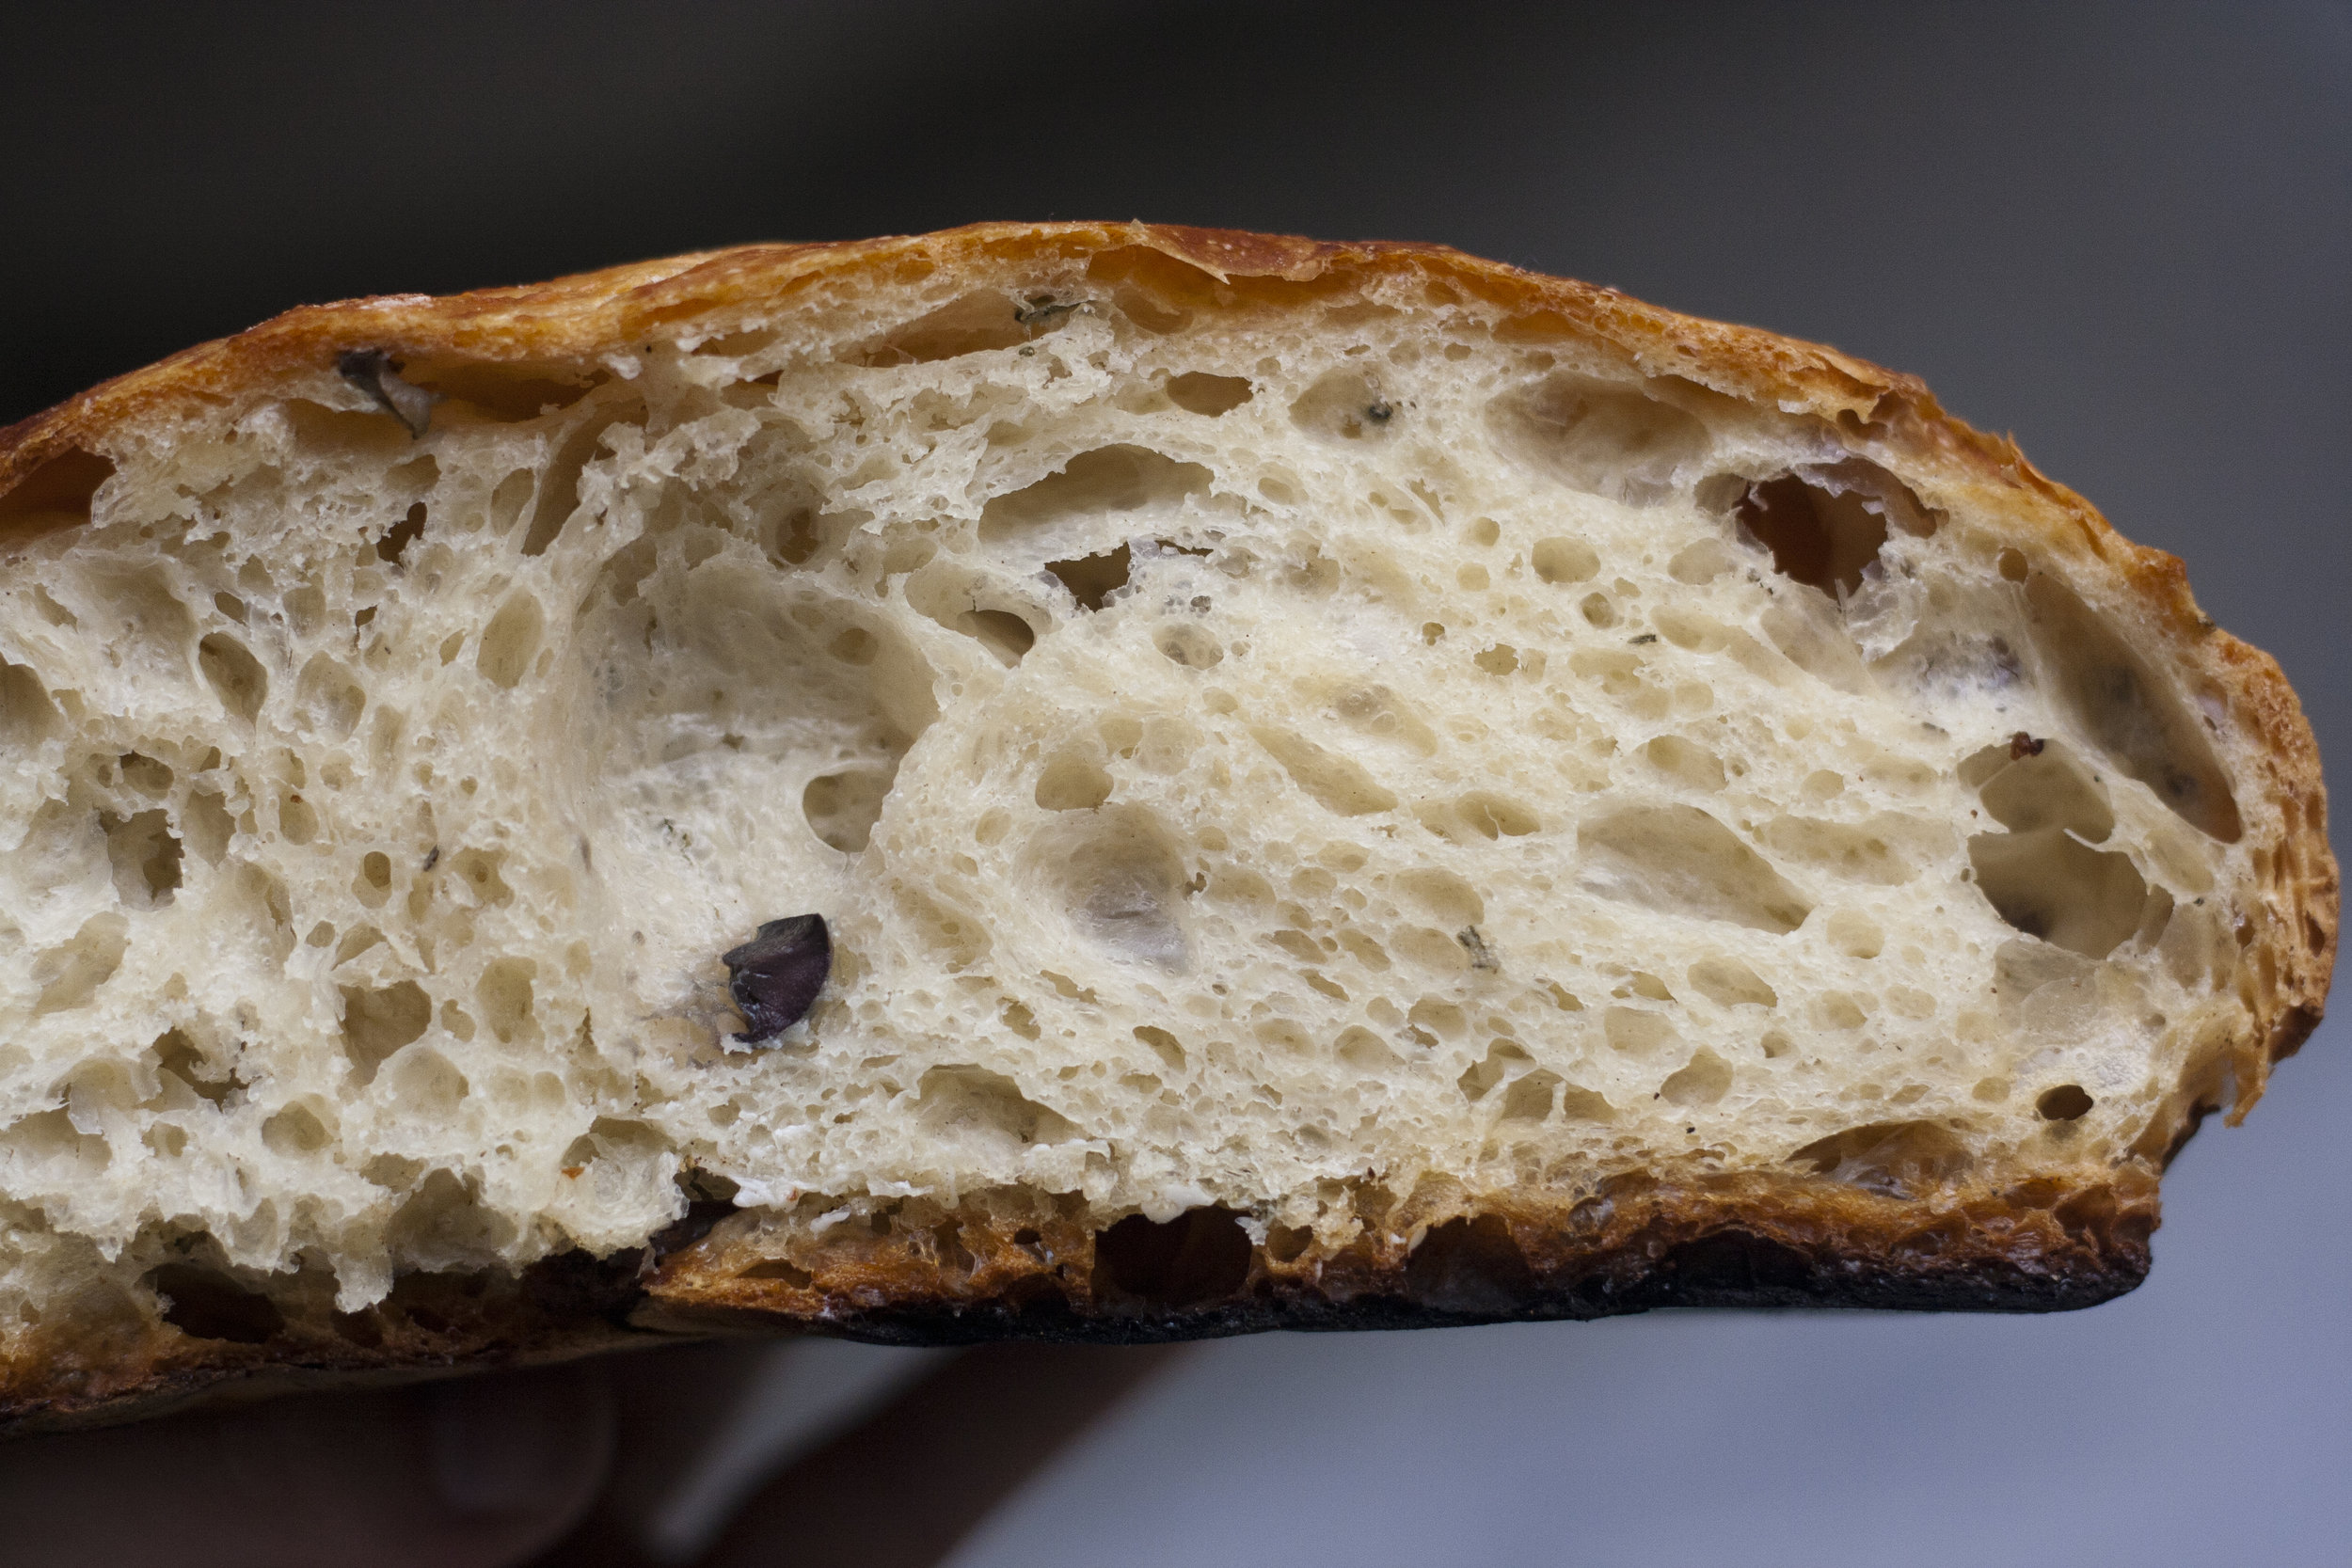
All you need for this recipe is a 4 ½ - 5 ½ quart Dutch oven (buy one cheap on Amazon!) and a basic ability to plan a little ahead. Over the past month, I’ve gotten real into this recipe, each batch emerging from the oven just a little bit better than its predecessor. And even though baking requires precision, I’ve managed to get a little creative, adding Kalamata olives and fresh rosemary from my garden. Despite my perpetual need to break the rules, the recipe really is perfect without any additions. The loaf is ideal for morning toast (butter will do but avocado is the way to go) on the side of dinner (think soup!) or really any occasion that calls for gluten, which is pretty much always in my book.
Note: This process takes about 20 hours all-in, so you’ll need to make sure you’re home at the right times. My strategy is this:
It’s Friday night. Do your thing! Come home around midnight, preferably a little tipsy. Follow step 1 of the recipe and head to bed.
Happy Saturday! It’s good to be alive! Around noon, remember that you’re a brilliant genius who had the forethought to make dough last night. Retrieve it from its hiding place and follow steps 2 through 6.
Sit in or near your kitchen while the bread is baking. Think deep thoughts or watch some Broad City while waiting for the bread to finish.
Remove the bread from the oven. Smile big at your creation and hold your ear close to the loaf to listen to it “sing” as air escapes and anticipation builds.
Dig in! Share it only if you must.
Sound like something you can handle? Of course it does! Then get ready to impress your friends, save a lot of cash on the store-bought stuff, and become as obsessed with this new ritual as I am.

Recipe taken from My Bread: The Revolutionary No-Work, No-Knead Method with some tweaks.
Ingredients (makes a 10-inch round loaf)
3 cups bread flour + a little extra for dusting (I use King Arthur brand)
1 ¼ teaspoons table salt (I actually use Kosher)
¼ teaspoon instant yeast
1 1/3 – 1 ½ cups cool water
In a medium bowl, combine flour, salt, and yeast. If you’re adding mix-ins like Kalamata olives & chopped rosemary, now’s the time to do it! Add the water and use your fingers to combine. If dough seems dry, add more water a tiny bit at a time until you have wet, sticky dough. Cover the bowl with a tea towel and store at room temperature out of direct sunlight for 12-18 hours to begin the first fermentation!
Dust a cutting board or work surface with flour. Carefully remove the dough from the bowl in one piece. As you begin to pull it away, the dough will still in long thin strands. That’s the developed gluten! With floured hands, lift the edges of the dough toward the center. Tuck them in to make the dough ball round.
Dust a tea towel (not terry cloth as it may leave lint on your dough) with flour. Lift the ball onto the towel, seam side down. Fold the towel over the dough and place it in a warm, draft-free zone for 1-2 hours. The dough is ready when it has almost doubled. If you poke the dough with your finger making a ¼ inch deep impression, it should hold. If not, cover and let rise for another 15 minutes.
Half an hour before the second rise is complete, preheat the oven to 475 degrees with the rack in the lower third position and the covered Dutch oven on the center of the rack.
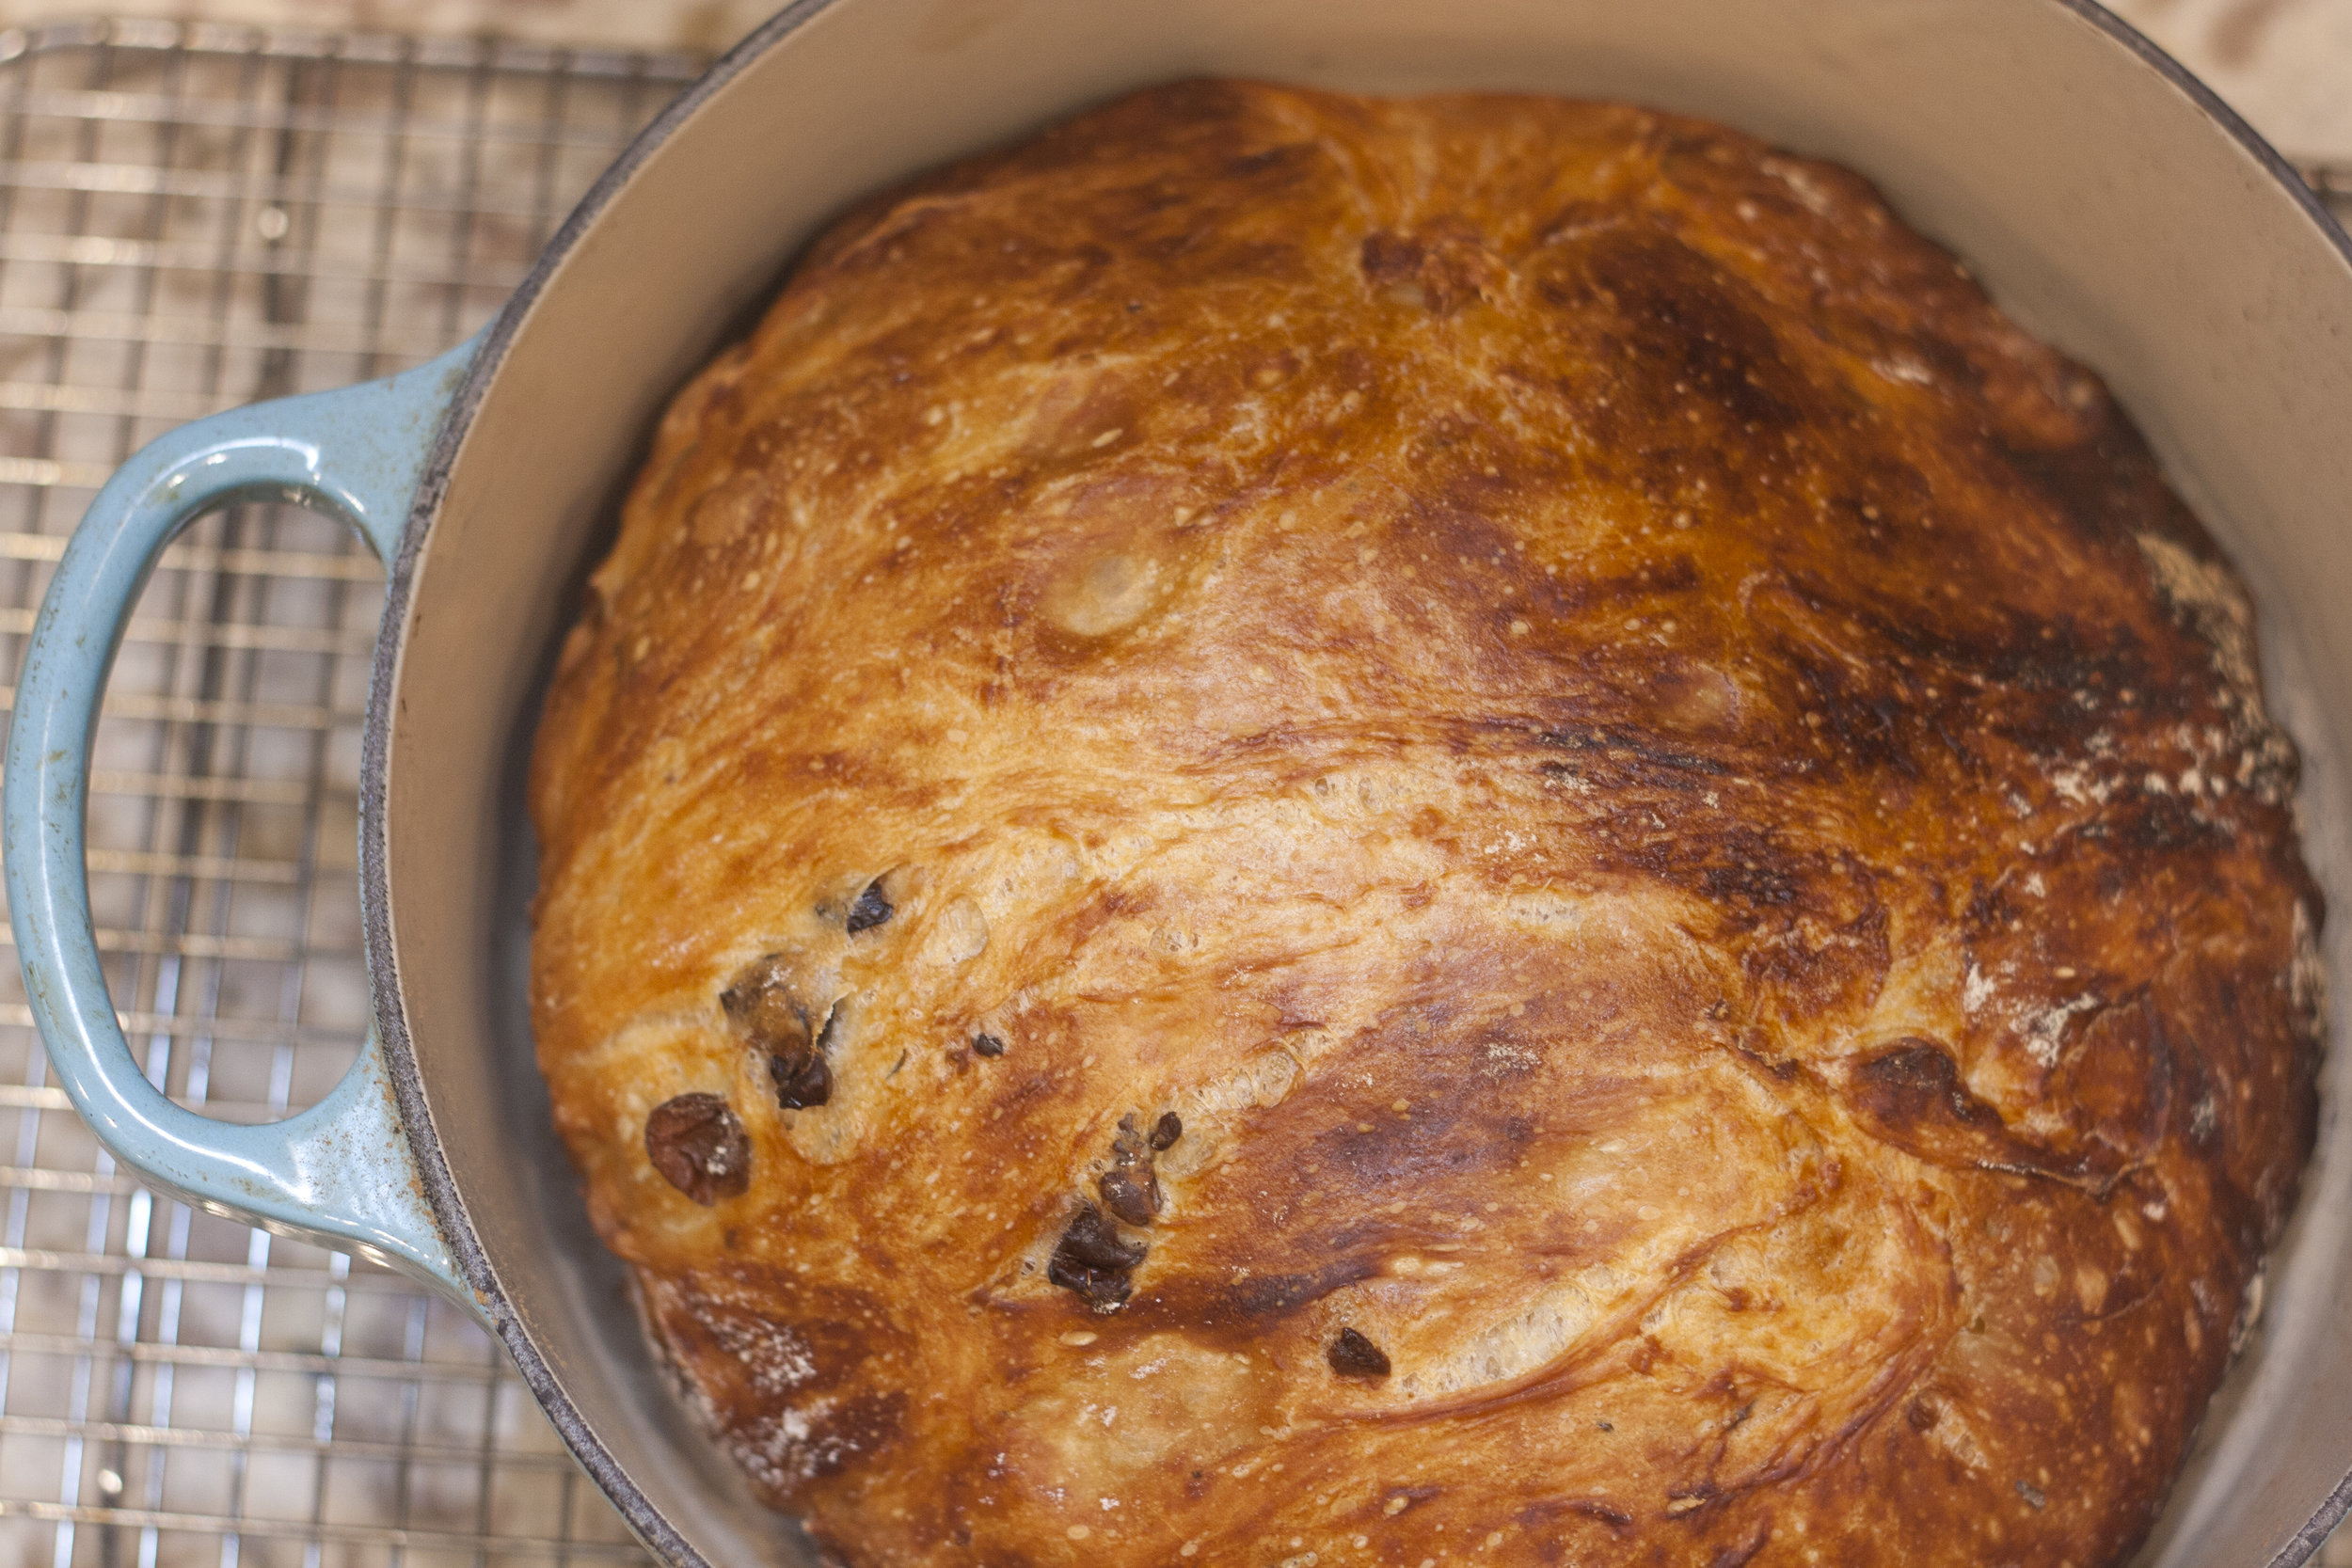
Unfold the tea towel and dust the top of the dough generously with flour. Use potholders to carefully remove the Dutch oven and take off the top. Gently, but quickly, invert the dough into the Dutch oven, seam side up. Put the top back on and bake for 30 minutes.
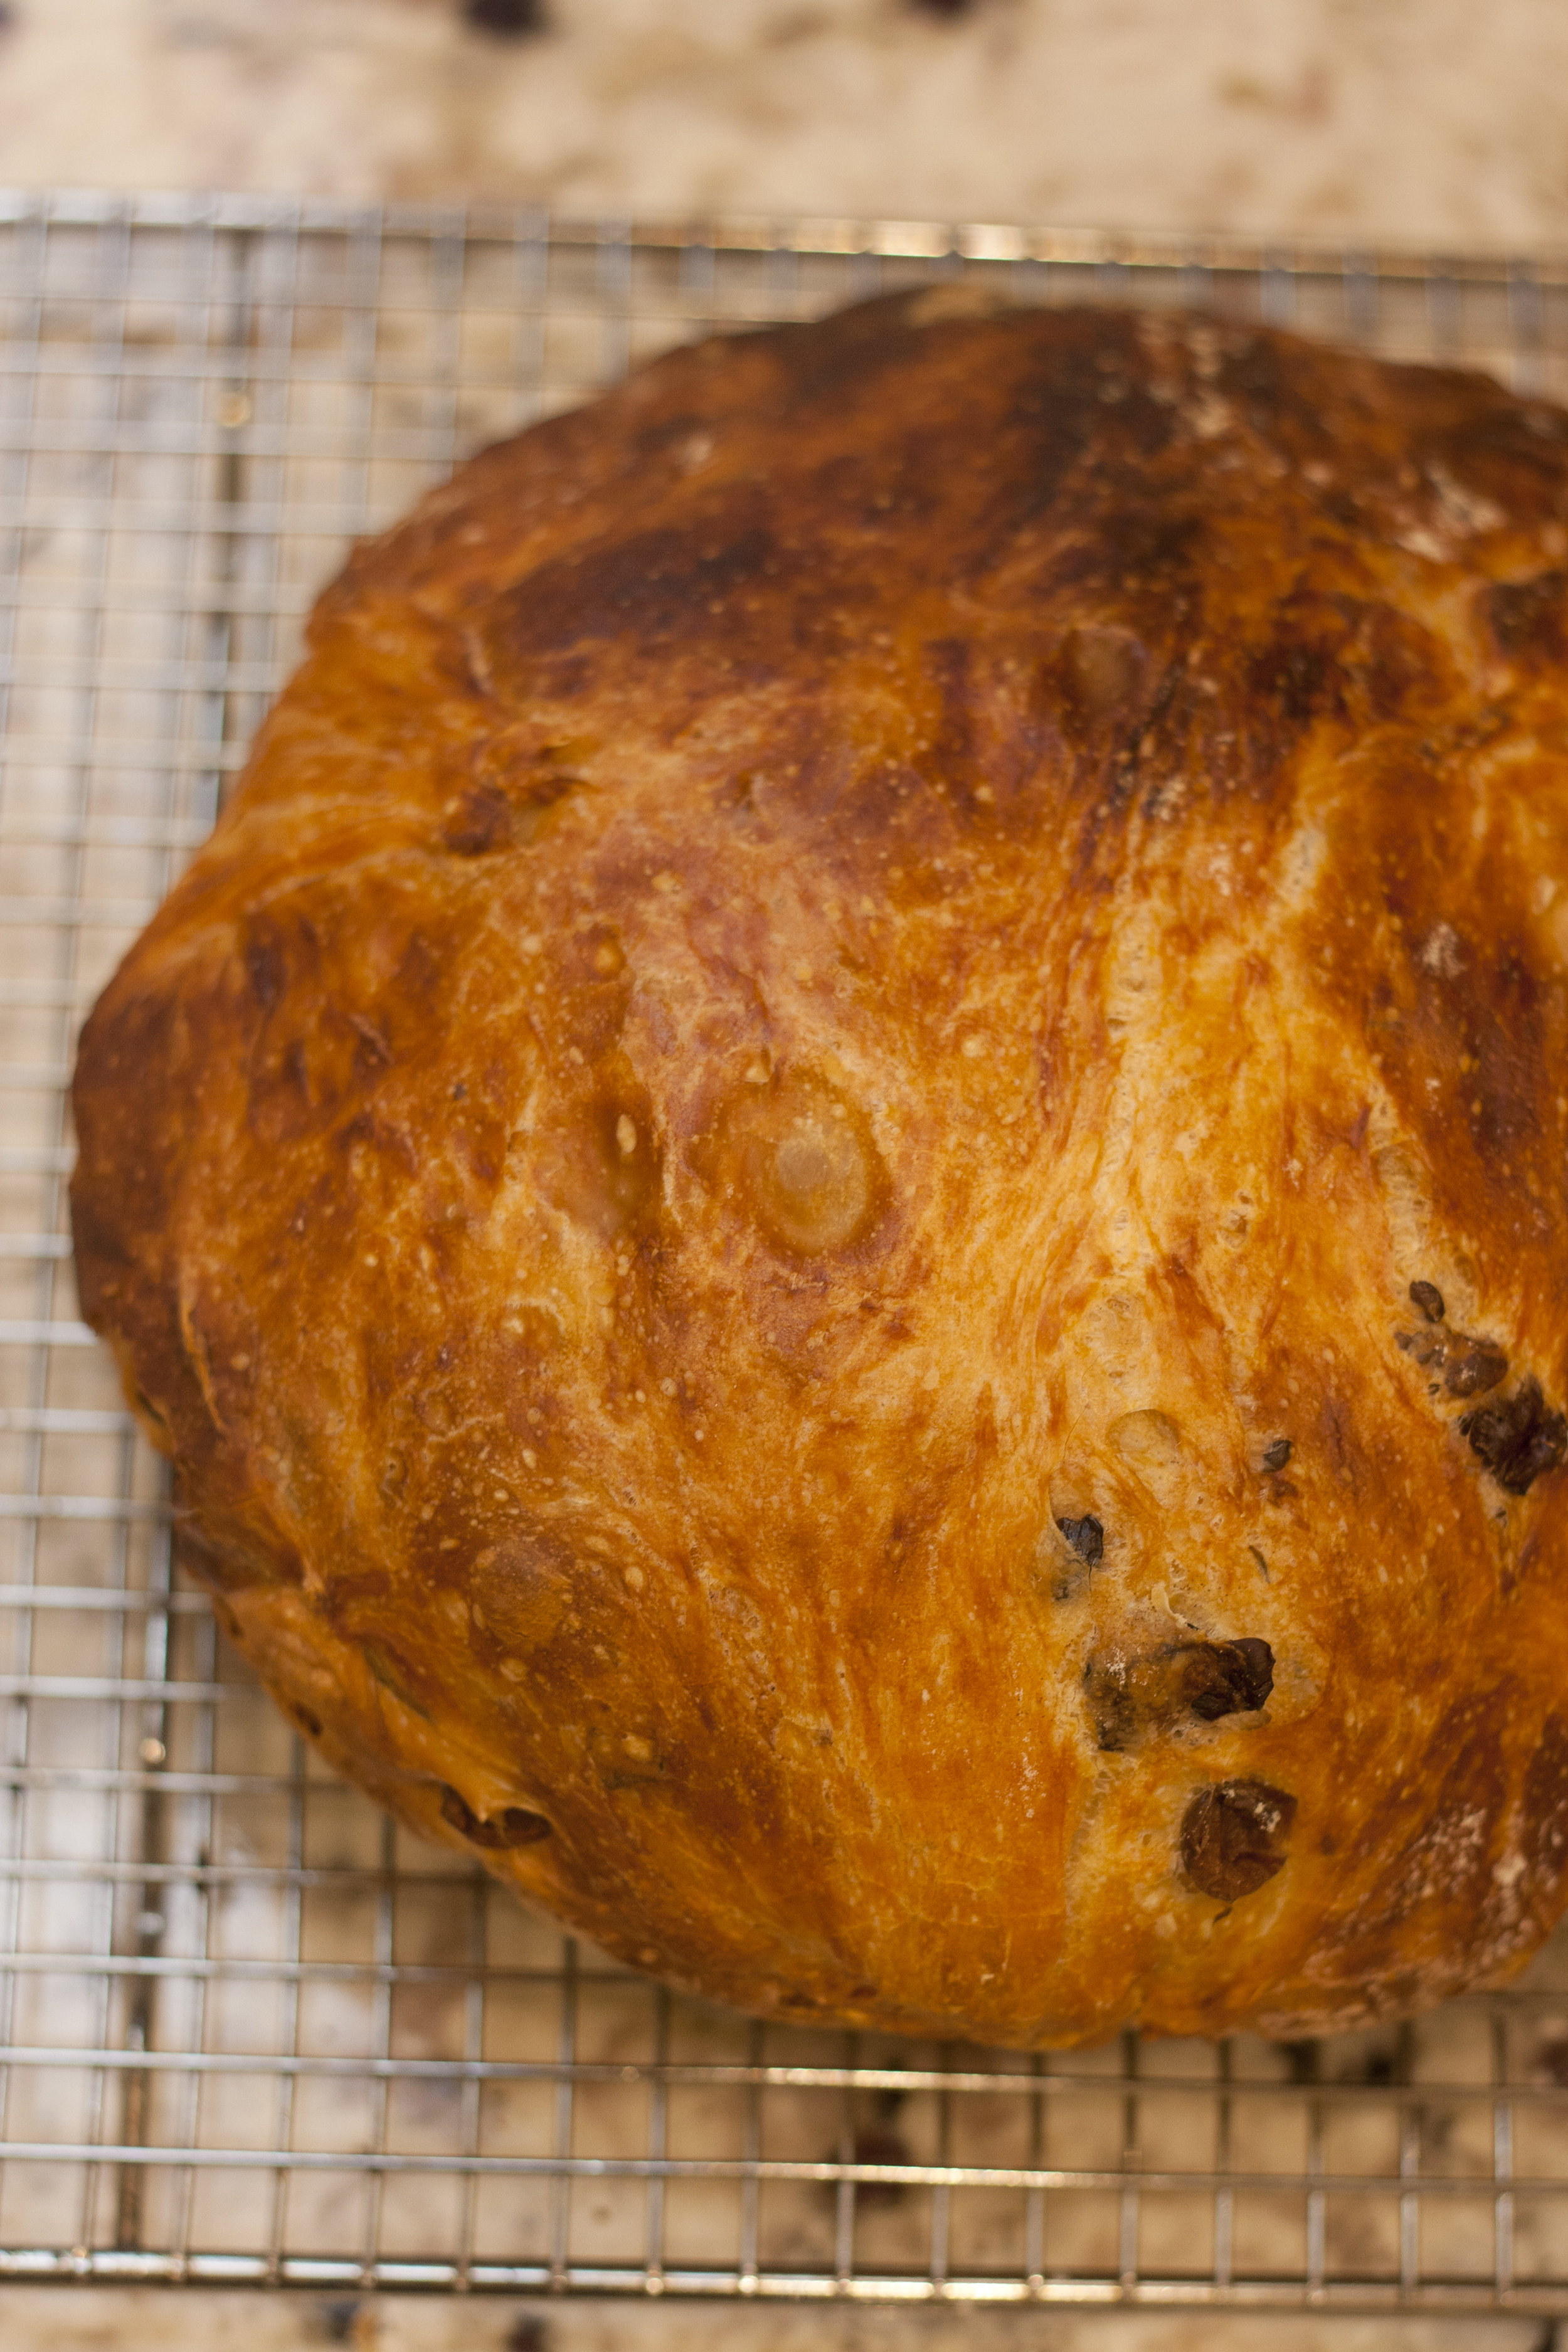
Remove the lid and continue baking until the bread is a deep chestnut color, about 15-30 minutes more. Use a heatproof spatula to lift the loaf out of the Dutch oven and place on a cooling rack. Let cool for as long as possible, but about 30 minutes should do.